
1. Overview #
For Python developers using Visual Studio Code, the Clicknium extension provides a range of features to streamline the process of creating Python automation projects. With Clicknium, you can capture, edit, and validate UI element locators for a variety of desktop applications and web browsers, run and debug automation projects, package projects as standalone executable files, and manage locator stores on the cloud. Additionally, Clicknium enhances your coding experience with features like code IntelliSense and error hinting.
2. Installation #
To install theClicknium extension, you can either download it from the Visual Studio Code marketplace or search for “clicknium” in the Visual Studio Code Extension marketplace.
Note : that the extension has a dependency on the Python extension, which will be installed automatically.
3. Connect to Cloud #
After installing the Clicknium extension, you’ll need to sign up for Clicknium or sign in with your Google or GitHub account. For more information on connecting to the cloud, please refer to the Connect to Cloud page.
4. Extension Installation #
The Clicknium extension provides a variety of automation extensions, such as the Edge Extension for Microsoft Edge browser automation. You can select and install extensions before writing automation code. For more information, please see the Automation Extensions page.
5. Create Project #
To create a new Clicknium project, open the Command Palette (Ctrl+Shift+P) and select or input “Clicknium: Create Project”.
Then, select the project path. You can either create a new empty folder for the project or select an existing folder that will be converted to a Clicknium project.
You can go to Project Management for more information.
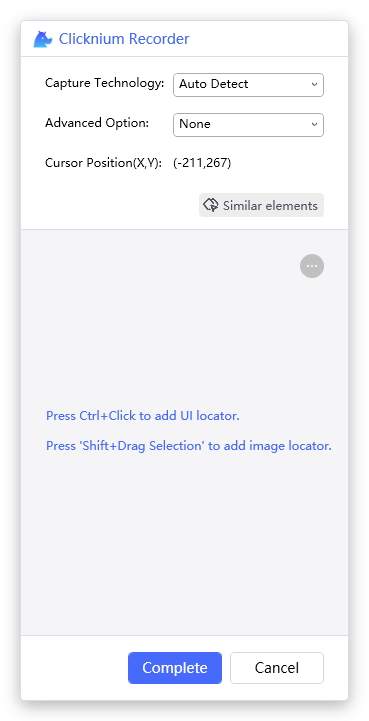
6. Capture UI Locators #
To capture UI element locators, press “CTRL+F10” in Visual Studio Code to invoke the Clicknium recorder. The “Capture Technology” field indicates which automation technology is being used to capture UI elements. The default setting is “Auto Detect”, which allows the recorder to automatically detect the application type and choose the appropriate automation technology for locator capturing. For more information, please refer to the Clicknium Recorder page.
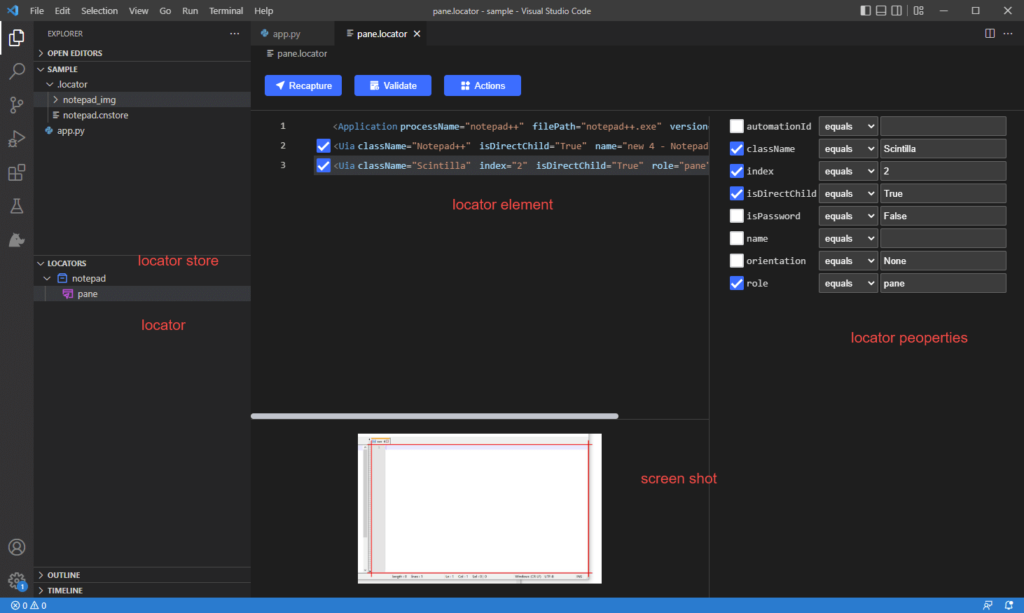
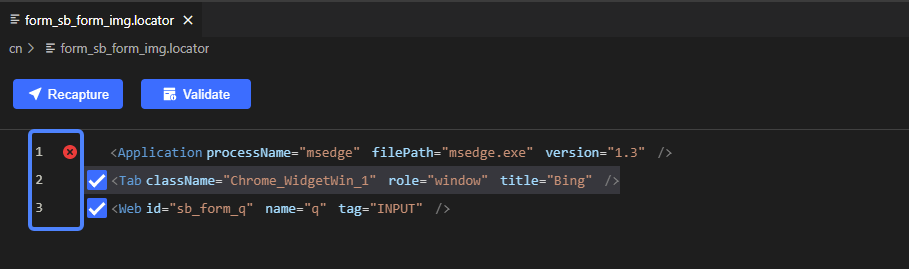
7. Edit and Validate Locator #
After capturing locators, you can open and edit them in the editor. For more information on locator management, please see theLocator Store page.
You can also validate locators by pressing the “Validate” button to verify if the target element can be located by the locator. The locator validation result is displayed at the head of each locator layer.
You can go to Locator Store for more information about locator management. For more about the locator, please refer to Clicknium Locator.
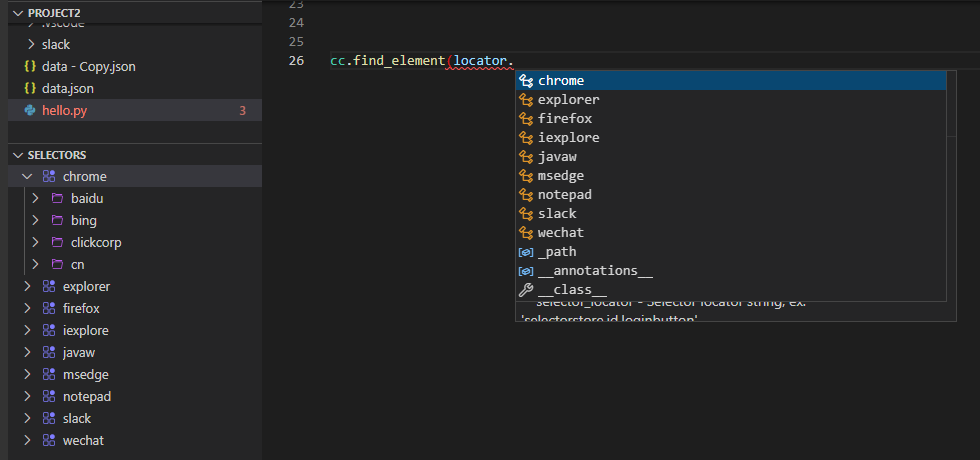
8. Writing code #
Clicknium provides many features to help you write automation code more efficiently, such as auto code complete and IntelliSense.
Auto Code Complete : For example, you can press “Ctrl+F10” to invoke the Clicknium Recorder for the locator parameter in “cc.find_element()”.
The captured element will be automatically filled into your code. To choose a locator from the locator store, Clicknium code extension shows the locator store list and the locator list for you to choose from.
For more information on coding features, please refer to the Code IntelliSense page.
IntelliSense:Clicknium provides plenty of features to help you write automation code more efficiently. For example:
Please go to Code IntelliSense for more features.
9. Run/Debug Project #
You can debug Clicknium Automation Projects by running or debugging using “F5” or “Ctrl+F5”, just like you would debug other Python scripts.
Alternatively, you can open the Command Palette (Ctrl+Shift+P) and select “Clicknium: Run” to run the project or “Clicknium: Debug” to debug the project. This will configure the running/debugging environment by checking the Python version in clicknium.yaml, restoring dependent package lists, and more.
10. Package Project #
Once a project is complete, you can package it as a standalone executable file to distribute to non-developer end users. To package a project, open the Command Palette (Ctrl+Shift+P) and select “Clicknium: Package”. For more details on packaging projects, please refer to the Project Package page.


